Free Jewelry Box Dieline Templates (SVG Download)
A dieline is the flat outline a box is cut and folded from. Get it wrong and you discover the problem after the tooling is made, which is an expensive place to discover anything.
The templates below are drawn 1:1 in millimetres, with cut lines and crease lines on separate styles so a cutting plotter or a die maker can read them directly. They are starting points, not finished production drawings — every factory's board thickness and wrapping allowance differs slightly, so treat them as a geometry baseline and adjust to your own tolerances.
Legend: black solid lines are cut lines. Red dashed lines are crease (score) lines.
What is in the download set
| Template | Internal / outer size | What it is for |
|---|---|---|
| Rigid setup base | 100 x 100 x 35 mm | The body of a telescoping ring, earring or pendant box |
| Rigid setup lid | 106 x 106 x 35 mm | The lid that slides over that base |
| Drawer sleeve | 100 x 100 mm section, 100 mm deep | The tube a necklace or bracelet slides into |
| Drawer tray | 96 x 96 x 30 mm | The part that actually holds the jewelry inside that tube |
| Book-style body | 100 x 100 x 20 mm | The low box used for gift sets |
Every file is an SVG. Illustrator, CorelDRAW, Inkscape and most cutting-plotter software open them directly.
1. Rigid setup box (telescoping lid)
The standard jewelry box: a base with four side walls, and a separate lid that slips over it. This is what most ring, earring and pendant boxes are. The lid is made slightly larger than the base so it slides on freely.
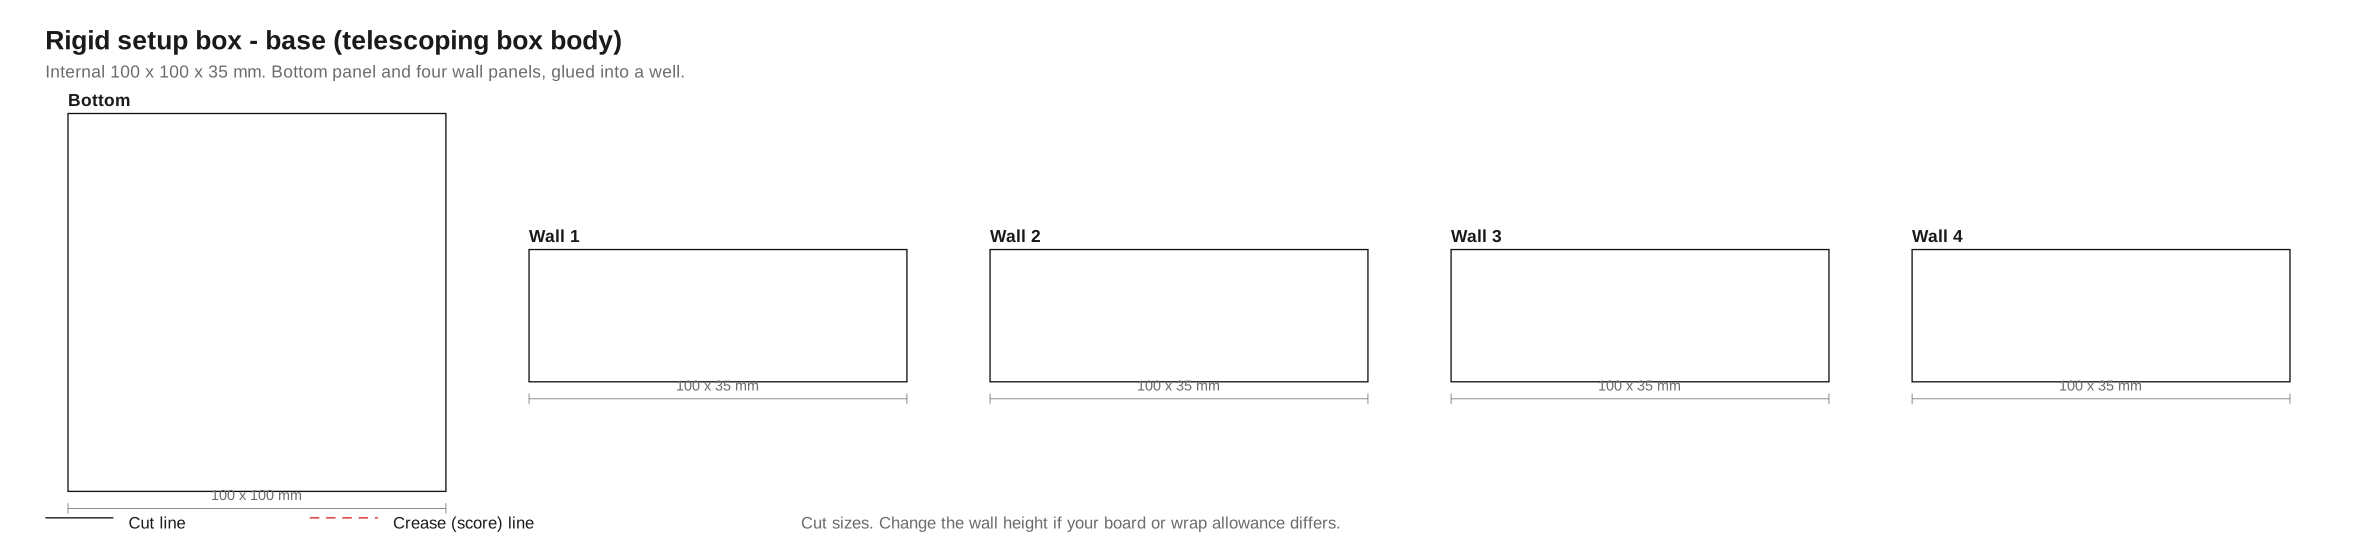
Base — 100 x 100 x 35 mm internal
Download the base dieline (SVG)
Five panels: one bottom of 100 x 100 mm and four walls of 100 x 35 mm. A square footprint is why these are the easiest boxes to quote — all four walls are the same part, so there is one drawing and one die. Go rectangular and you get two wall sizes instead.
The drawing is the cut size. Wall height is measured inside the finished box, so the 35 mm is the space for the jewelry, not the height of the board.
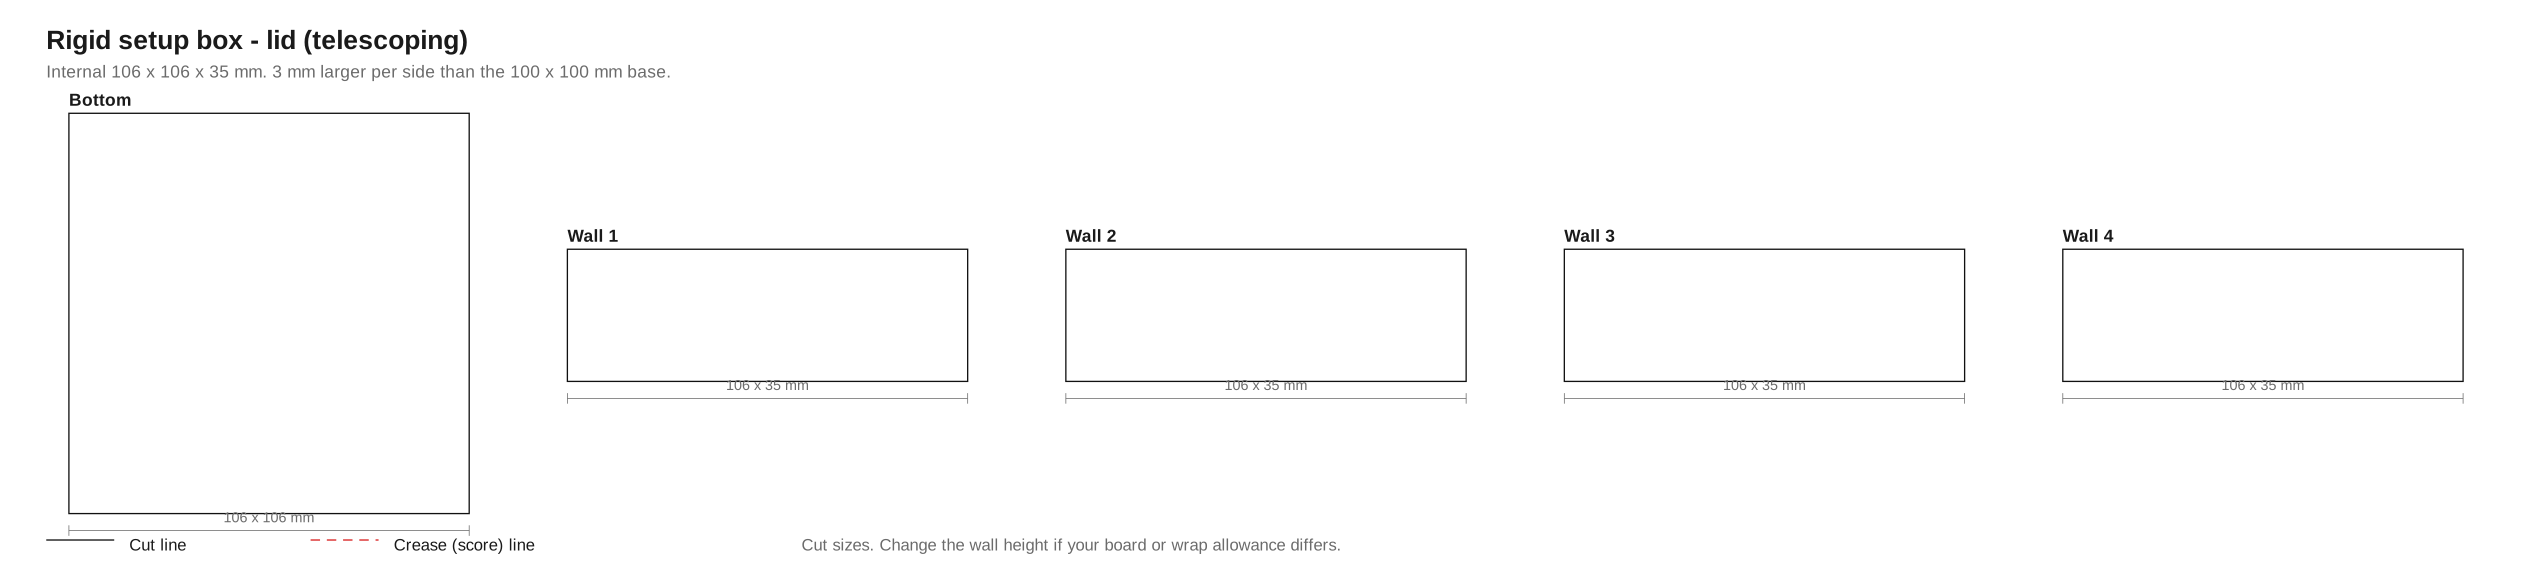
Lid — 106 x 106 x 35 mm internal
Download the lid dieline (SVG)
Same five panels, footprint at 106 x 106 mm. That is 3 mm larger per side than the base, which is the clearance the lid runs on.
The wrap paper adds roughly 0.3 to 0.5 mm per surface, and it goes on both parts, so the clearance you actually get after wrapping is closer to 1.5 to 2 mm per side. If a lid catches, add 1 mm to the lid footprint before you touch anything else — the hinge geometry is rarely the problem.
2. Drawer box (sleeve and tray)
A sleeve wrapped into a square tube, with a tray that slides out. Popular for necklace sets and for anything the customer is meant to keep. The sleeve is one piece with a glue flap; the tray uses the same construction as a rigid base.
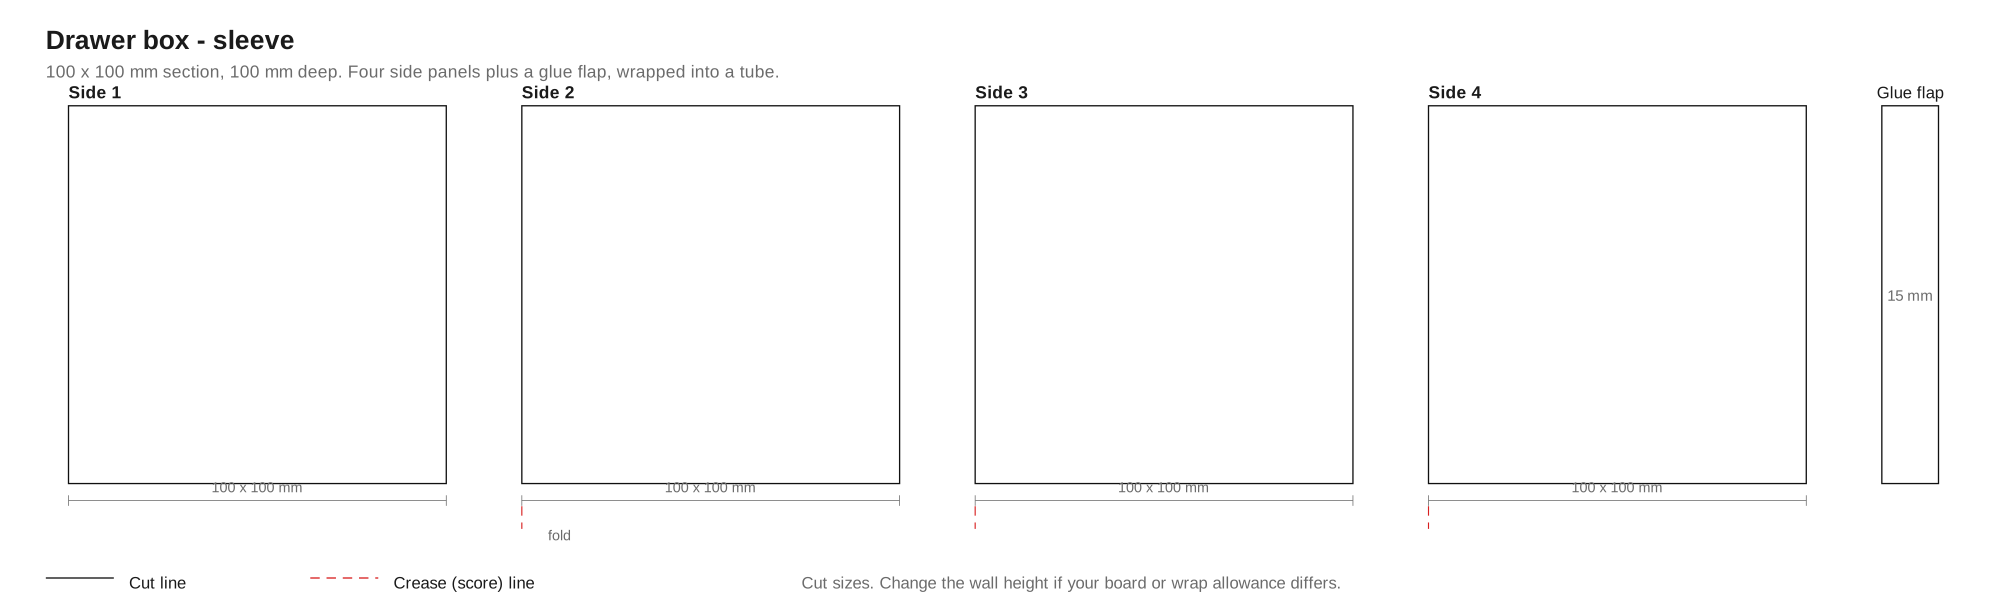
Sleeve — 100 x 100 mm section, 100 mm deep
Download the sleeve dieline (SVG)
Four side panels of 100 x 100 mm in a row, plus a 15 mm glue flap on the last one. The 100 mm depth is the direction the neck or the wrist goes, so it is the dimension customers notice first when it is short.
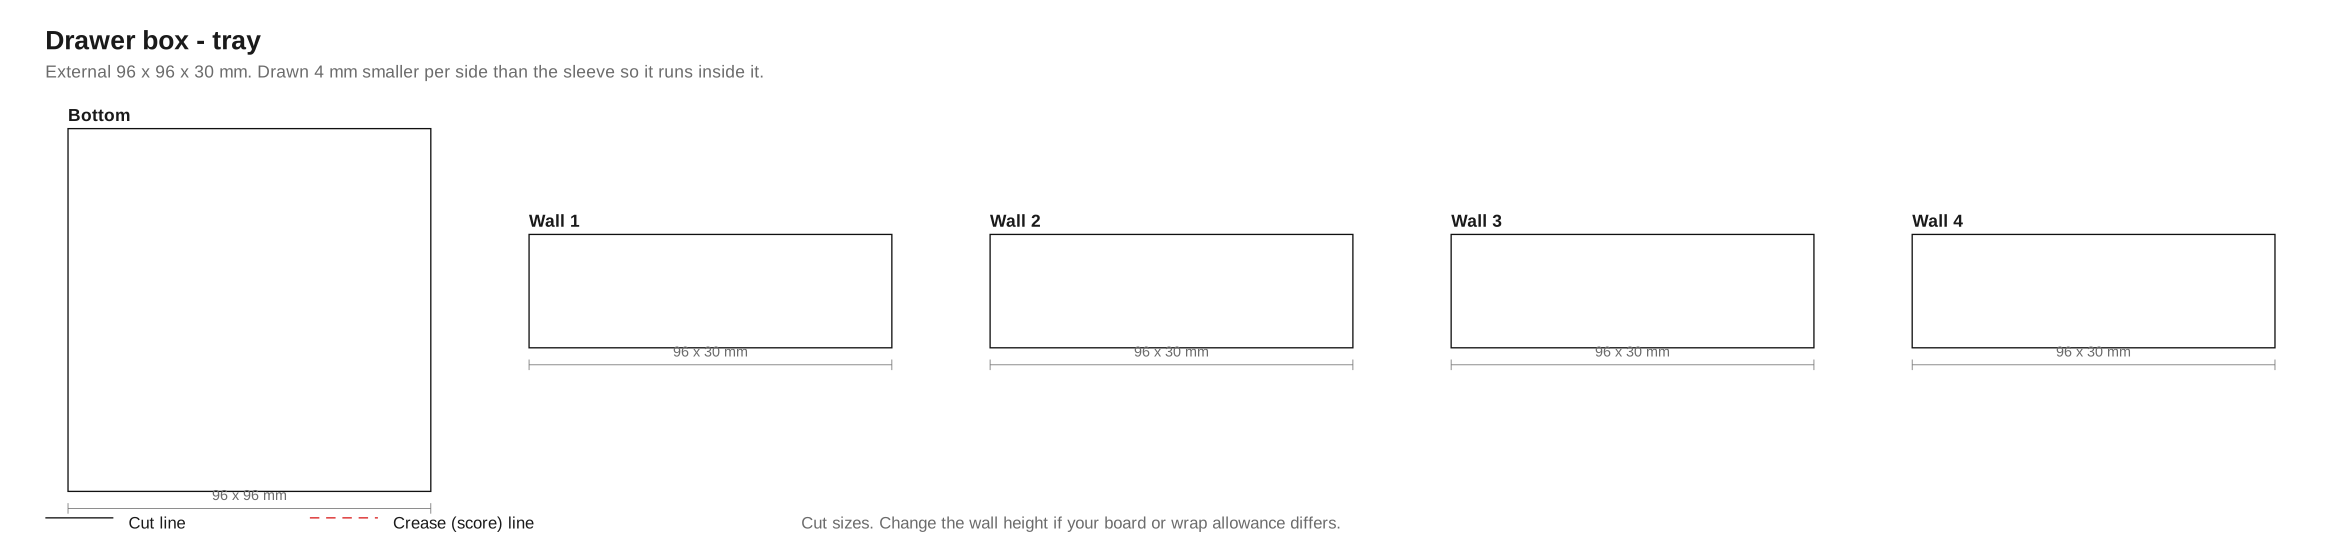
Tray — 96 x 96 x 30 mm
Download the tray dieline (SVG)
Bottom of 96 x 96 mm with four walls 30 mm tall. It is drawn 4 mm smaller per side than the sleeve so it drops in with clearance on all four sides — drop a tray straight into a sleeve drawn to the same size and it will stick, because the two parts were never wrapped at the same time.
Thirty millimetres of wall keeps the necklace flat rather than piled. If you are boxing a bracelet that does not lie flat, raise the wall instead of widening the box.
3. Book-style magnetic closure box
One piece, folded like a book, closed with concealed magnets. It reads as more expensive than a telescoping box at a similar board cost, which is why it is common for gift sets and for higher price points.
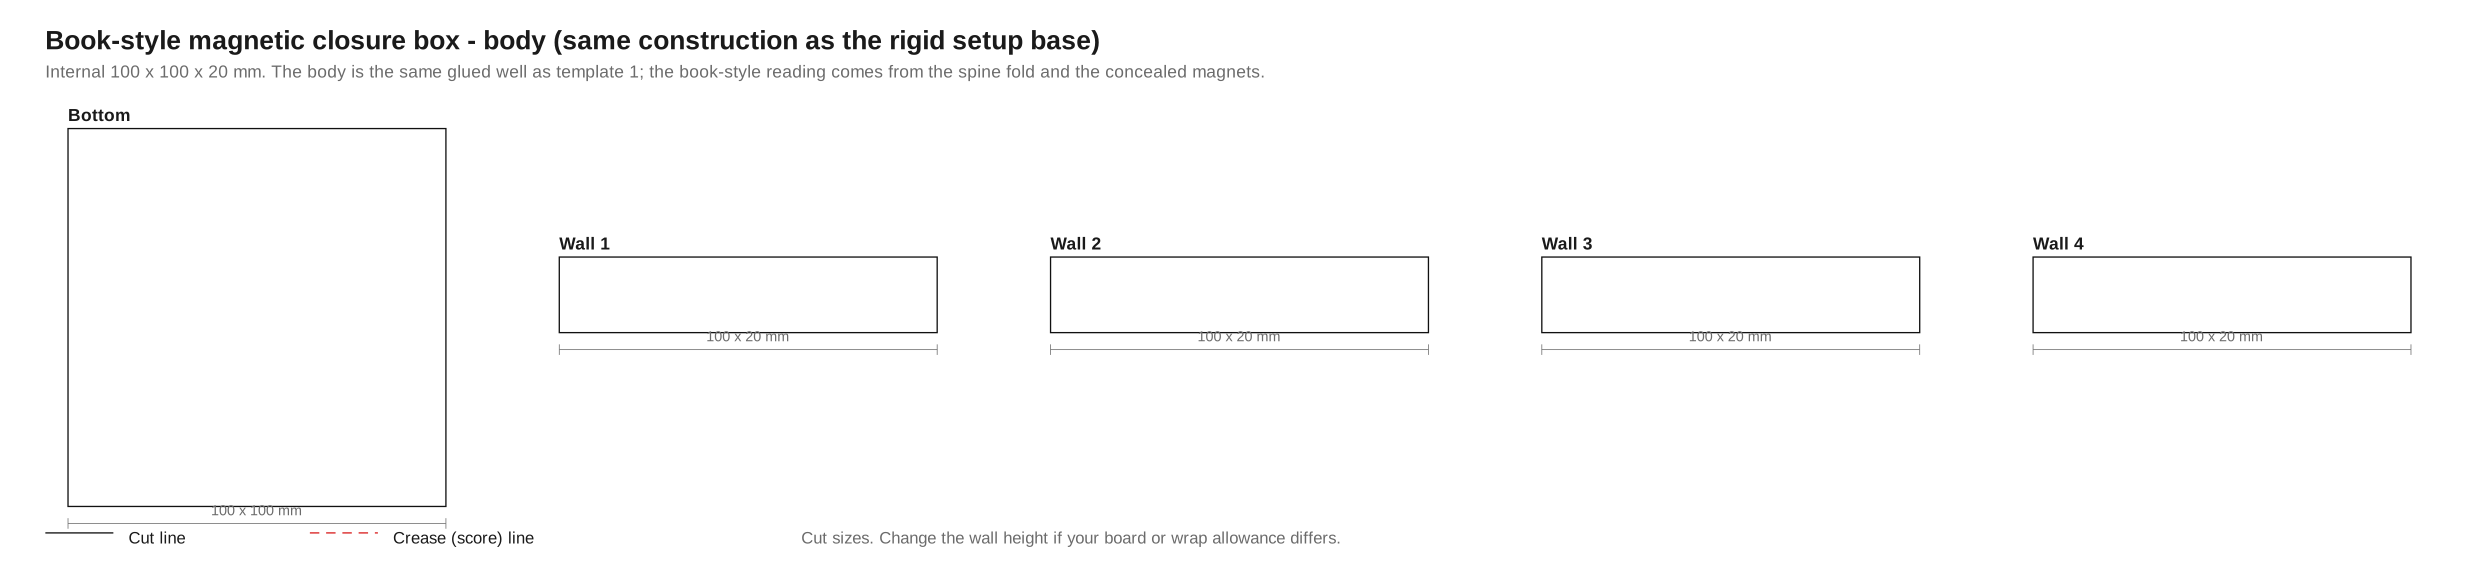
Book-style — 100 x 100 mm, 20 mm height
Download the body dieline (SVG)
Same glued well as the rigid setup base, with the wall height at 20 mm. At that height the box is a shallow tray rather than a box, which is the point — it flattens for shipping and still closes.
The spine fold and the magnet positions are not on the drawing. Magnet placement is a decision about your product — where the closure sits against what the customer wears — so specify it on the order rather than assume it.
Starting dimensions by jewelry type
These are internal dimensions and are meant as a starting point. Confirm against your actual product, particularly for anything with a stone that stands proud of the setting.
| Jewelry type | Internal size (mm) | Suggested construction |
|---|---|---|
| Ring (single) | 50 x 50 x 40 | Rigid setup, ring slot insert |
| Stud earrings | 45 x 45 x 35 | Rigid setup, foam or velvet pad |
| Pendant (short chain) | 70 x 70 x 35 | Rigid setup, hooked pad |
| Long necklace | 180 x 50 x 30 | Drawer box |
| Bangle or bracelet | 90 x 90 x 45 | Rigid setup, cushion pad |
| Bracelet (flat) | 220 x 50 x 30 | Drawer box |
| Set (3-5 pieces) | 200 x 150 x 40 | Book-style magnetic |
| Travel case | 100 x 100 x 50 | Zip closure, rigid shell |
Before you send a dieline to a factory
- Confirm board thickness. Rigid jewelry boxes commonly use greyboard from 1.0 mm for small boxes to 2.5 mm for large ones. Thicker board changes the wrap allowance, so specify it on the drawing.
- Add bleed. If the wrap paper is printed, extend artwork 3 mm past every cut line.
- State whether dimensions are internal or external. This is the single most common source of a box that does not fit. Write it on the drawing itself.
- Allow for the wrap. The paper covering adds roughly 0.3 to 0.5 mm per surface. On a lid that slides over a base, that is the difference between smooth and sticking.
- Specify the insert separately. Foam, velvet, EVA and moulded pulp all need their own drawing, and the insert fit depends on the jewelry rather than the box.
- Make a white sample first. An unprinted, unbranded sample costs little and catches geometry errors before tooling.
If you are working through packaging for the first time, our guide to what to consider when choosing jewelry packaging covers the decisions that come before the dieline, and the material comparison covers what the box is made of.
Are these templates free to use commercially?
Yes. Use them for commercial packaging projects, including sending them to a factory as a starting point. They are provided as-is; verify the geometry before committing to tooling.
Can I open SVG files in Illustrator?
Yes. Illustrator opens SVG directly. Set the document units to millimetres after opening and confirm the artboard matches the stated size, because some import settings default to pixels.
Why are some lines dashed?
Dashed lines are creases, where the board is scored and folded rather than cut. Solid lines are cuts. Most die makers and laser cutters expect the two on separate layers; check with yours before sending.
How much clearance does a lid need?
For a rigid setup box, draw the lid 2 to 3 mm larger per side than the base. The templates do it at 3 mm, which lands at roughly 1.5 to 2 mm once the wrap paper is on both parts. Below that the lid catches, particularly in humid conditions where the board expands slightly.
What file format should I send a factory?
AI, PDF or DXF are the usual choices. Whichever you send, state the units and whether dimensions are internal or external. A drawing with no unit label is the most common reason a sample comes back the wrong size.
Do you make custom sizes?
Yes. Custom tooling is normal for jewelry packaging, and the cost is usually recovered over a few thousand units. Start from a MOQ conversation rather than a drawing, because the board choice and the insert both affect the minimum quantity a factory will quote.
Need a dieline built to your product?
Send us the jewelry dimensions and the construction you have in mind, and we will return a drawing matched to our board and wrap tolerances. Start here. If you want the finished boxes rather than the drawing, see our jewelry boxes and organizers line.
Previous: Ring Size Conversion Chart: US, UK, EU, Japan and Millimetres
Next: How to Care for 316L Stainless Steel Jewelry: Cleaning, Storage and the Myths
Everything free is on one page: the free jewelry resources hub collects every chart, calculator and template above in one list.
Frequently Asked Questions
What is a dieline used for?
It is the flat outline a box is cut and folded from. Get it wrong and the discovery arrives after the tooling is made, which is an expensive place to learn anything. It also sets the slot positions your interior fittings sit in.
Can I edit the template myself?
Yes, they are vector files meant to be changed, and the usual edits are slot count, slot width and lid depth. Keep the fold lines intact and recheck the finished size, because a dieline is measured flat rather than assembled.
Does starting from a dieline lower the minimum?
It lowers the design cost, not the minimum. 500 pieces per style and colour still applies, since the tooling sets the floor. What a known dieline mainly shortens is the first sample round.
What this means for your order
If you are still deciding, one thing decides this for you: a dieline is only half the work - the structure you draft has to be reviewed against the tool you intend to use, or it will draft beautifully and make nothing. Everything else on a quote page is presentation.
Where this falls short only half useful if you have no one in-house to check the geometry before it goes to a cutter.
What to send us which of the five dielines matches your box, and we will review it against tooling.
Get a quote
Send the drawing, target material and volume. We reply within one business day with the MOQ, the sampling and bulk lead times for your piece, and the step each one belongs to.